Home
Banner Formatting
TIP!
The following applies to all Asset and Resource banners except:
(a) PebblePad default templates; and
(b) Custom resources where the creator has NOT selected the banner option 'Allow modifications in response'.
(c) Pre-defined Collection and Activity Log banners within workbook assets.
Resize Image
Most banners will have a Resize Image button when the Asset or Resource is viewed in Edit mode (see above Tip for exceptions).
.

Banner resize button
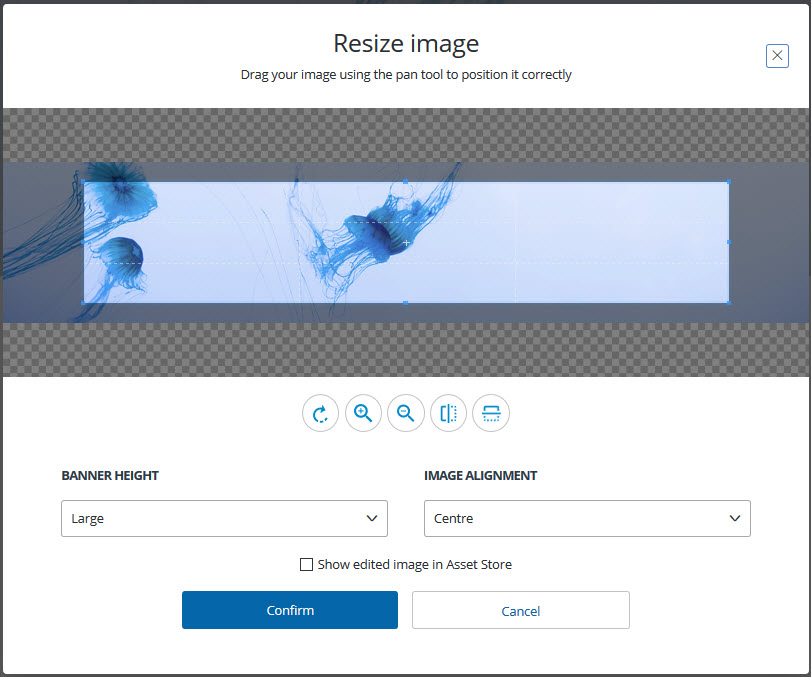
Click on Resize image to open the image resizing tool:
.

Banner image resizing tool
- Move the image overlay around to select the part of the image that you want displayed in your banner.
- Resize the image overlay to select a smaller or larger portion of the image. The selected part will expand to fit the banner space.
- Use the five blue icons underneath the image to:
- rotate the image
- zoom in
- zoom out
- flip the image hoizontally
- flip the image vertically
- The BANNER HEIGHT dropdown can be used to select:
- Auto - the height will resize according to the size of the screen it is being viewed on
- Large - the default for workbooks and all Get Creative assets
- Medium - the default for templates
- Small - perfect for pages within a workbook or portfolio
- The IMAGE ALIGNMENT dropdown can be used to select where you want your image to be pinned (Centre; Top Right; Bottom Right; Top Left; Bottom Left). This comes into play when the banner is viewed on a smaller screen. The position of alignment will be the part of the banner that is always visible if the full banner image cannot be displayed.
NOTE: Activity Logs, Collections and Blogs do not have the Banner Height or Image Alignment options.
- The Show edited image in asset store option enables you to save the edited image, with its new size and content, to your Store so that it can be used in other Assets and Resources. The title of the new image will include the image dimensions.
Banner Block Properties
When building a Page, Portfolio, Template or Workbook, the Banner Block Properties (in the Properties Panel) are largely the same. All have the following banner options:
- BANNER HEIGHT - same choices as outlined for the Resizing tool above
- LAYOUT - choose to add heading text over the image, below the image, or have no text
- SUBTITLE - choose to add sub-title text below the heading text
The Page and Portfolio builders have an additional option to add colour to the Banner Block. This enables you to have a smaller banner image (by using the zoom out option until the image is smaller than the overlay) with a background colour.
The Template and Workbook builders include the option to Allow modification in response. When this is ticked, the banners of any assets created from these resources can be edited and changed.
TIP!
Your workbooks and portfolios can have different banners on each page - both in terms of size and image. And you can have pages without any banners at all if you prefer.